How to Auto Login Windows on Vmware

In this post, we are going to show how to auto login Windows on Vmware without typing a password.

Note: I used Vmware 9.0 and Windows 7 for tutorial.

To be clear, we are wondering how to auto login to windows guest OS on Vmware. And we are going to make every effort to do the task.

enable auto loginFirst, we need to open a Windows virtual machine. Next, go to VM tab -> Settings -> Options tab -> Click on Autologin item. -> Click the Enable button on the right. -> Type in your user name and the password together. -> Click OK.

  • No Enable button? Run your Windows OS and update to the Latest Vmware Tools: Click on VM tab -> Update Vmware Tools. The installation process should be completed in your Windows virtual machine. That’s why you must run the Windows.

Change user you want to automatically login as: open VM tab -> Settings item -> Options tab -> Click on Autologin -> click on the Change user button. -> Enter another new user name and password. -> Click on OK.

Disable autologin for some user: Click on Disable instead of the above step: click on Change User. That’s how to auto login Windows on Vmware. Good luck to you!

Related Posts:

Pst Recovery Tool for Windows

Pst is actually short for “personal storage table.” It is one type of “person folder file”, which is used to store emails, contacts, calendar, notes, tasks, etc. All in all, it’s so closely related to your everyday life that some accidental mistakes might put you in trouble. That’s why you need a pst recovery tool for a rainy day.

  • Tips: Personal storage table contains a mass of mailbox files. Each of them has an extension of .pst.

pst fileBesides, these files are password protected commonly because they contain much private info. In a word, we need the real password to access the pst file. But if you forgot the password, you are put at risk of losing access of your pst file, or rather, your important information.

Fortunately, Daossoft Outlook Password Rescue, a pst recovery tool can help you retrieve the password on Windows very quickly. And all you should do is only several mouse clicks. Here’s the user guide of Outlook Password Rescuer.

Secondly, you can also choose to send for a technician. But it’s really expensive. You are really recommended to use a recovery tool from the Internet in place of traditional sources.

Related Posts:

How to Bypass Editing Limitation on Word: The Perfect Way

This is the perfect way and free way to bypass editing limitation on Word. It’s very simple-all you need is the free PDF2Word program plus several mouse clicks.

First, open the Word document with editing limitation. (Can’t open it? Probably you are facing a open password. Unlock it first.) On this occasion, you will be unable to do any editing or make any other changes.

 -> To get started, save the Word document file whose editing limitation you’d like to bypass as PDF format document: Click on the Office logo in the top-left corner. -> Expand “Save as”

 -> Download and install PDF2Word 3.1 (100 times free use, enough!). Run it right now.

pdf to word

-> Convert to *.doc / *.docx format document from *.pdf format: Click on “File” -> “Open” -> Browse to the pdf document. -> Click “OK” directly,  ignoring others. -> Select a location to save the new *.doc file. All you need to do next is to wait a moment. It will take about/less than 1 minute for the process bar goes to 100% complete.

-> Next time you open the new Word document,  the editing restriction will be cancelled and you will be allowed to edit it, print it.

Related Posts:

Tips on the PST File in Microsoft Outlook

If you are using Microsoft Outlook, then you should know that Outlook cannot live without PST files. So it is expcially important and necessary for you to grasp the basic tips on the Outlook PST file.

What is a Outlook PST file?

A PST (.pst) file is short for personal storage table file. It is a type of data file which is used by all versions of Microsoft Outlook from Outlook 2000 up to Outlook 2013. As a matter of fact, PST files are very complex database which store a user’s Outlook data for POP3,IMAP and web-based mail such as emails,email attachments,contacts,calendar,appointments,tasks and other items.

Where are the Outlook PST Files Located?

According to the version of Outlook and your Windows operaing system, PST files are created in the following Windows locations by default.

  • Outlook 2007 and previous on Windows XP
    C:\Documents and Settings\”username”\Local Settings\Application Data\Microsoft\Outlook\.
  • Outlook 2007 and previous on Windows Vista, Windows 7or Windows 8
    C:\Users\”username”\AppData\Local\Microsoft\Outlook\
  • Outlook 2010 on Windows XP
    C:\Documents and Settings\”username”\My Documents\Outlook Files
  • Outlook 2010 and Outlook 2013 on Windows Vista, Windows 7 or Windows 8
    C:\Users\”username”\Documents\Outlook Files.

Well, you may can’t clearly remember where the PST files are located. We might as well let the Microsoft Outlook itself tell you. Simply do as below:
1. Click “File->Data File Management…” in Outlook 2003 and Outlook 2007. While in Outlook 2010 and Outlook 2013 there are a little different, lick “File->Account Settings->tab Data”.

data file management

2. Account Settings Window opens as below.Click to highlight the “Data Files” item and then you can see all the .pst files and locations listed.

pst files' locations

How to find Outlook PST files?

To find Outlook PST files, you also can open the “Account Settings” by click “Tools->Account Settings”.

account settings

So Account Settings Windows opens. Click “Data Files”. Then select the pst file and click “Open Folder…”.  Then you will be taken to the .pst file.

open folderIn addition, as we have learned the Outlook PST files are located in Windows default path, you also can directly go to that path to find the PST files.

Related Posts:


How to Encrypt Files-Set Passwords for Files

This post covers how to encrypt files. To set passwords for files, you need some helpers, such as WinRAR, 7 Zip, Bitlocker, etc. Here are 6 methods to encrypt files online or offline. Hope these help you out.

Method 1: Use WinRAR

Put the file(s) you want to password protect in a folder and compress the folder by right clicking on the folder and selecting Add to archive.

On the shown dialog box, switch to the Advanced tab. -> Set password -> OK -> OK

Method 2: Use 7 Zip (completely free)

Right click on the folder or file you want to encrypt. -> Expand 7-zip. -> choose Add to archive -> under Encryption, type a password and confirm it. -> Choose an Encrption method . -> Click OK button.

add to archive

Once the process bar goes to 100%, you will encrypt the files resoundingly. Next time you double click the zip archive, you won’t be able to open it without typing the right password.

enter password

Method 3: Utilize BitLocker app

Put your secret files onto your USB flash disk. And then make good use of Windows’ BitLocker software utility. The main steps you should follow are: 1. Connect the disk drive with the files you would like to encrypt. 2. Go to Bitlocker Drive Encryption in Control Pane. 3. Turn on Bitlocker for your flash drive. Details on: How to Password Protect Removable Data Drives in Windows 7/8/8.1

Method 4: Encrypt files online

Go to https://encryptur.com/ to decrypt or encrypt files on the internet.

To password protect a file, enter a proper password, click on Encrypt and select the file you want to password protect.

To decrypt a file, similarly, enter the correct password, click on Decrypt and select the encrypted *.simp file.

Method 5: Use Simple File Encryptor (FREEWARE)

Free download: http://simple-encryption.com/downloads/simplefileencryptor.html

ONLY 3 steps to encrypt files:

-> Select the folder or file(s) you’re going to encrypt.

-> Input a good password. (What is a good password? How to have a good password? Answer on: How to Create a Strong and Safe Password – Let You Remenber it Easily)

-> Click Encrypt files button.

Method 6: Use Vmware to encrypt files

Place your important private files on a Vmware virtual machine and lock the OS with a password so that nobody but you can access the OS. Then, nobody can access the files without a password. Next time you want to access your files, just power on the virtual machine and type the admin password.

That’s it. Thanks!

Related Posts:

How to Get Password for Encrypted Zip File

Here is how to get password for encrypted Zip file. We hope the three methods mentioned right away can help you out. Try them before you say die.

 Method 1: Search the Zip file name on Google, Yahoo or Bing

If the zip file is a public, well-known file, it is quite possible to get the password you need just from search engine.

 Method 2: Online Zip password recovery service

How does it work? You upload a zip file and they will try their most to get the password for you. Once they get the password resoundingly, you need to pay for the manual service before you get the password in hand. As far as I’m concerned, this is really not cost-effective. You need to pay about 10 Euros to the man that  helps you get zip password using zip password recovery tool every time. Why not buy one by yourself and recover zip password at unlimited times? That’s cheaper.

 Method 3: Use Zip Password Recovery Tool

If it’s a 100% private file, Method 1 can’t do nothing for you. Fortunately, you can use software to help you crack that hard nut. Zip Password Rescuer runs faster than common Zip password recovery tools with the help of GPU accelerating. Get your ZIP password back in less time. Download it freely and give it a try before you pay for it.

How can I get password for encrypted Zip file?

Well, you can get the password after several mouse clicks.

  1. Start up Zip password rescuer.
  2. Select the encrypted zip file that you want to crack.
  3. Select attack mode.
  4. Start the password recovery process to get the password for you.

Once it gets the password for the encrypted zip file successfully, it will pop up a dialog box, telling you what the password is. You just copy the password to unlock the encrypted Zip file.

Related Posts:

Backup and Restore Files on Your Windows Computer

I suppose you, as a Windows computer user, must have lost your personal files and couldn’t recover them. Data loss is an annoying thing, right? So it is especially necessary to backup the files on your Windows computer now and again before losing them.

What data on your Windows computer should be backed up?

All files which are important to you should be backed up now and again. For example, programs, applications, installation packages, documents, pictures, music and other files. But what you need to back up are more than these. You should have a little common sense. Let’s list some of them.

  • Windows system: Many times, we need to roll the system back to its previous state. So it is necessary to backup your Windows system.
  • The programs and applications: To ensure the normal operation of your system some programs and applications are necessities. You need to back them up.
  • The installation package: You’d better backup the installation package of some software in case of crash.
  • The files/documents: The files/documents you create and update frequently should be backed up in time.
  • Pictures and Videos: You must don’t want to lose some pictures and videos which contains lots of precious memories of your family/friends. So back them up.
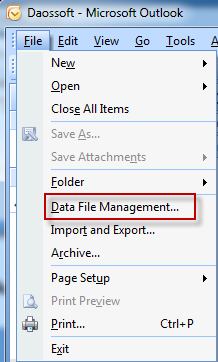
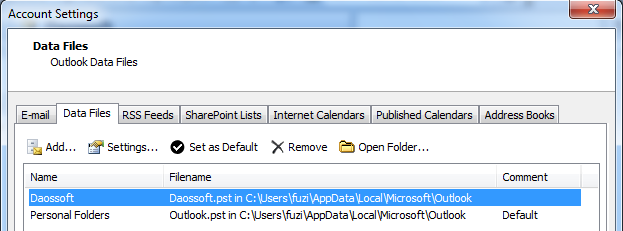
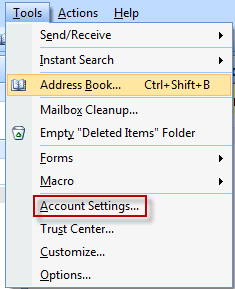
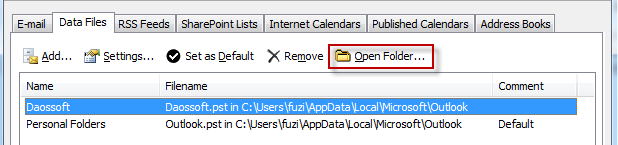
  • Emails: If you are using Microsoft Outlook you should back up the .pst file where all your email are restored in case of losing all your important emails.

Where Can your Computer Files Be Backed up?

Usually, we can back up files on the computer’s hard drive to a different storage device such as internal hard drives, external hard drives, writable CDs or DVDs, USB flash drives, a memory card, network locations. In that case, once the hard drive gets damaged we still can restore all the information on the computer.

How to Backup Files on Your Computer with Windows 7?

Windows 7 is the most widely used operating system. While, not all people know how to backup files free in Windows 7. Some people would use a backup software. As a matter of fact, Windows 7 has its built-in backup and restore tool with which we can conveniently backup fils. Steps are as below.

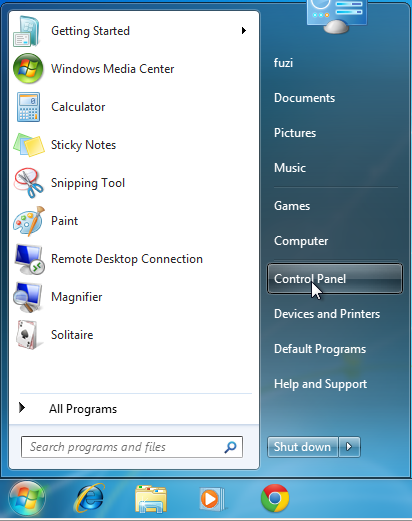
Step 1: Click Windows key and then “Control Panel”.

open control panel

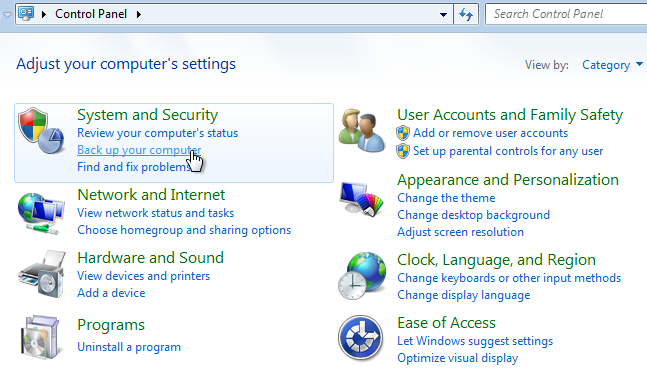
Step 2: Control Panel Windows opens as below. Click “Back up your computer” under the “System and Security”.

control panel

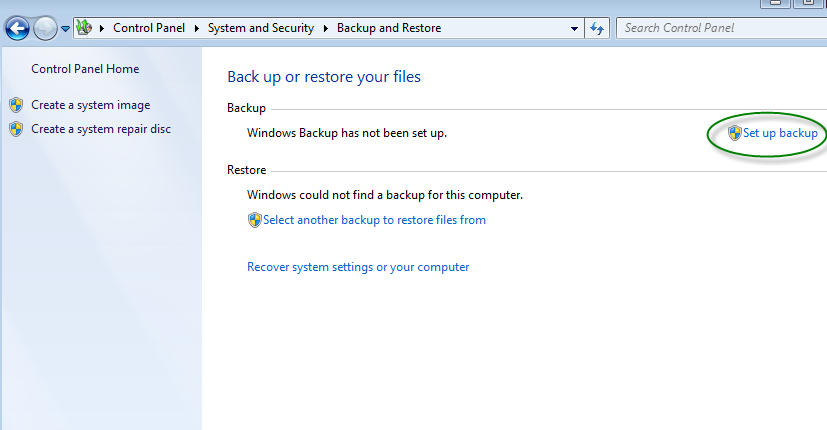
Step 3: If this is your first time to use the Backup and Restore tool. It should prompt you that Windows Backup has not been set up. Just click “Set up backup” link.

set up backup

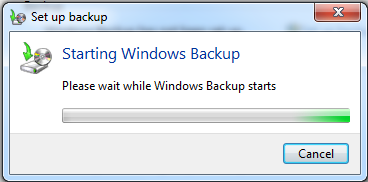
Step 4: Windows is setting up backup.

Windows 7 backup is setting up.

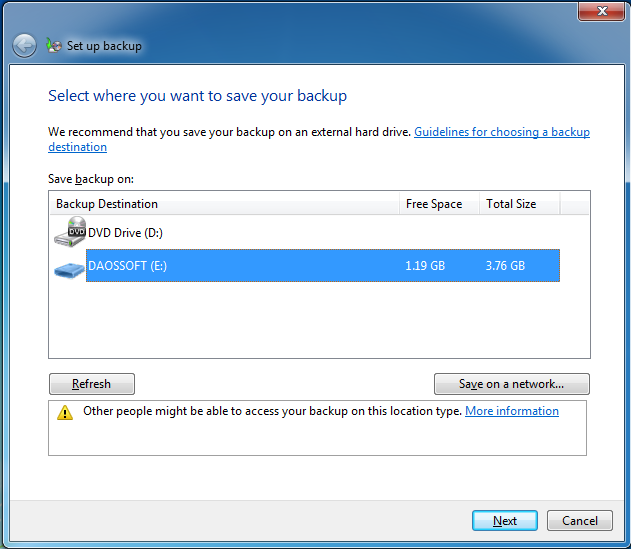
Step 5. For convenience, here we select a USB flash drive to save the backup on. Highlight the backup destination to select it. Then click Next.

Backup destination

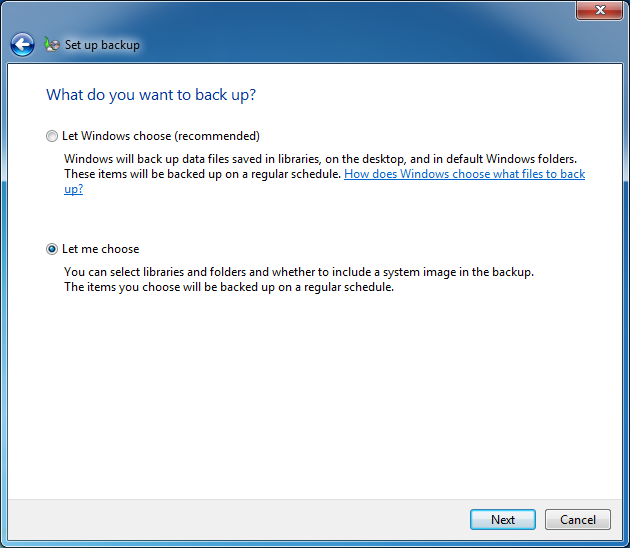
Step 6: Now you will choose what you want to back up. If you choose “Let Windows choose”, the following items should be backed up:

  • Data files that are saved in libraries, on the desktop, and in the default Windows folders.

And if you choose “Let me choose”, the following items should not be included in the backup:

  • Programs files.
  • Files that are in the Recycle Bin.
  • Temporary files on drives smaller than 1 GB.
  • Files stored on hard disks whose format is FAT file system.

Generally, you are recommended to choose “Let Windows choose”. In order to explain more details here we select “Let me choose” and then click “Next”.

choose what to back up

Step 7: Check items which you want to back up. Then click Next.

check files you want to back up

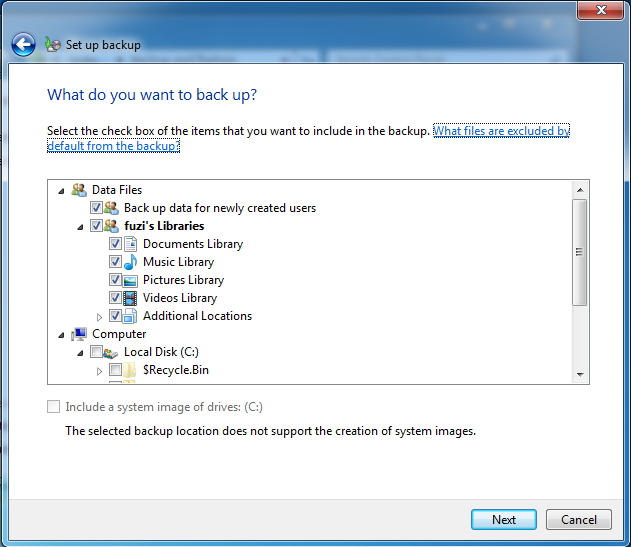
Note: You must notice the prompt in the picture above which says that “The selected backup location does not support the creation of system images”.That’s because a system image can’t be saved on a USB flash drive or a writeable CD/DVD.

Step 8: Finally, click “Save settings and run backup” to start backing up.

save settings and run backup

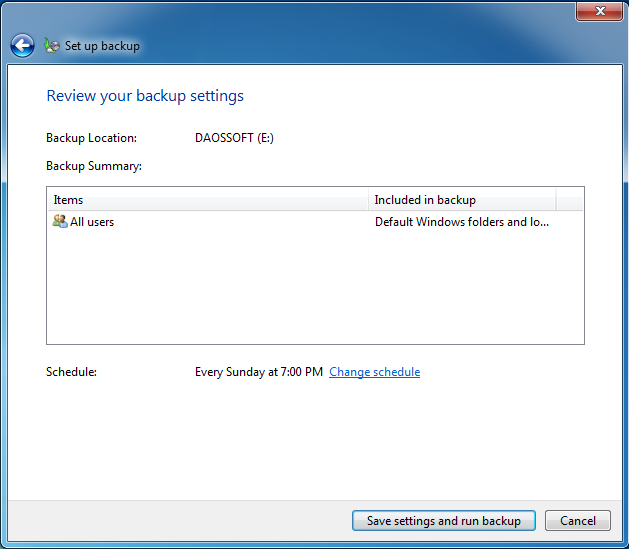
In addition: You can click “Change schedule” in the picture above to decide how often will you backup, monthly, weekly or daily.

change schedule

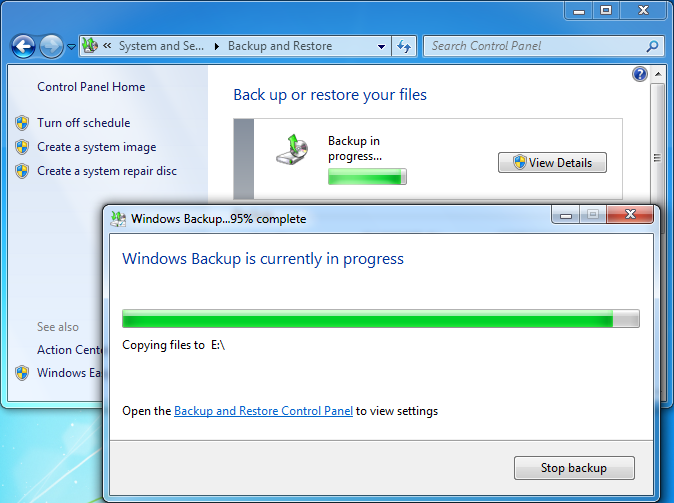
Step 9: Now Windows is backing up your files. You can click “View Details” to view the current progress.

Windows is backing up.

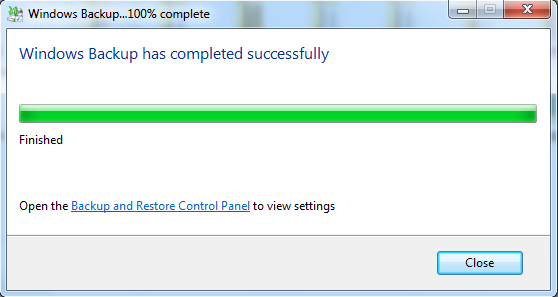
When the progress is 100% completed. Click “Close” to finish backing up.

backup is completed

And then you will see two backup files in your USB flash drive as below:

backup files

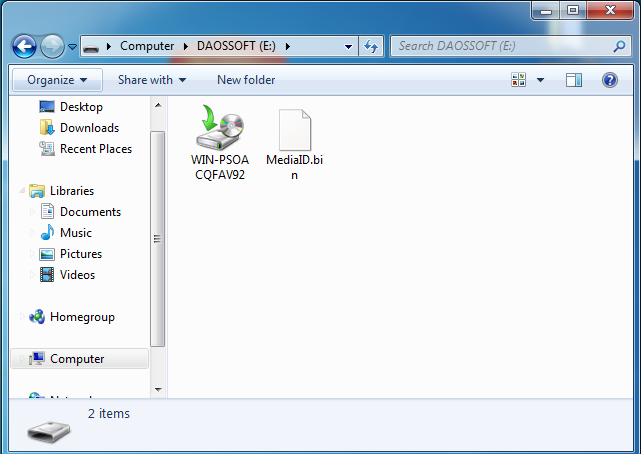
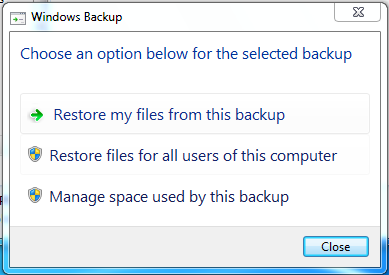
Double click the backup file and you can restore files or manage the backup size.

restore backup or manage size

How to Restore Files from Windows 7 Backup?

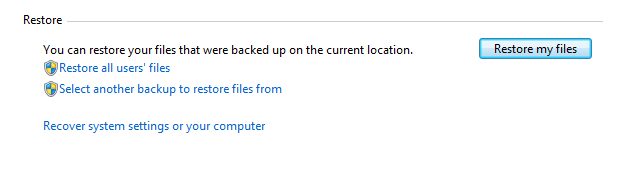
If you need to restore files from the backup in Windows 7, still on the Control Panel click on Restore my files.

restore my files

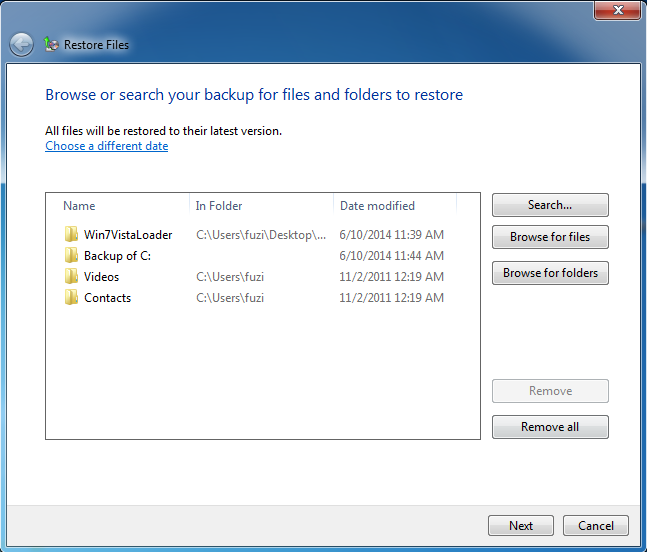
Then you can browser or search the backup for your files. And add them to the list. Then click Next.

add files or folders

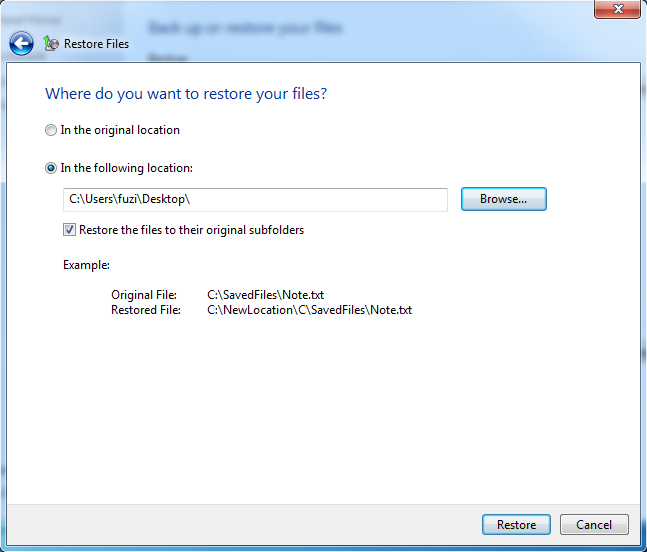
Then you can restore them to the original location or choose another different location then click “Restore”.

where to restore your files

Files should be restored. When restoring is finished click Finish to close the Restore utility.

It is similar to backup and restore data on the computer with Windows 8, 8.1, XP. They all have their built-in Backup and Restore utility, which greatly make convenience for Windows users.
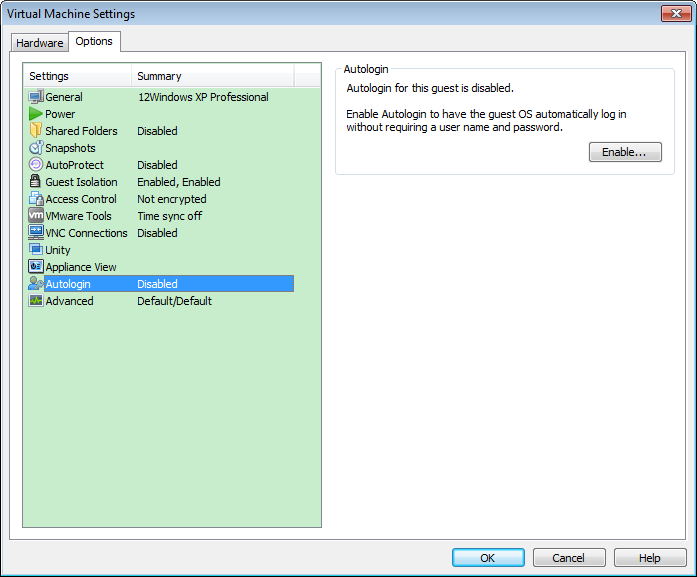
How to Reset Windows 8 Password on Dell Venue Tablet

Dell Venue is a series of Dell Windows 8 tablet. It runs pre-installed Windows 8 though it has touch display, power button and volume button. These differences from desktop computer determine that it will be kind of different to reset Windows 8 tablet password.

 ::How to reset Windows 8 password on Dell Venue tablet? Follow this step-by-step guide:

 -> Download Windows Password Rescuer Advanced and install it on another Window computer or tablet.

 -> Run it and follow the steps and instructions on the program interface to create a password reset drive.

(Turn to the locked Dell Venue tablet.)

-> Power on Dell Venue tablet from being powered off by pressing Power button. Note: Powering up Dell Venue by restart doesn’t work.

 -> Press and hold volume down until you get the Dell logo.

-> Once into the Dell Venue 8 or11’s UEFI BIOS, disable Secure boot (usually in Security or Boot tab) and adjust the boot device sequence to boot from Daossoft password reset disk drive.

-> Once getting into the user interface of Windows password rescuer, follow the steps on the screen. In general, you need three little steps to reset Windows 8 password.

  1. Select the Windows 8 operating system on dell Venue (someone might install over one OS on his dell Venue tablet.)
  2.  Select the user whose password you got lost and would like to perform password reset on.
  3. Click on the Reset Password.

-> Restart the tablet and return to the sign-in screen where you won’t have to type in a password. Just leave the password box alone and click the arrow button directly.

 Note: When you get those above done and get back into the Windows 8, don’t forget to change the default password (The default password is set to blank password.)

 By the way, you are highly recommended to come up with a good password. Then what is a good password? In short, a good password should be strong enough that it won’t be easily guessed or hacked. In addition, a good password should be easily remembered by its owner. Otherwise, the password user won’t have a good time on using it. Luckily, Windows Password rescuer will be 100% behind you-help you get out of trouble when you make a mistake.

Related Posts:

How to Boot from USB on Dell Venue Windows 8 Tablet

Here is how to boot from USB on Dell Venue Windows tablet. Read on and get the detailed steps. Closely follow them until you make it. Please let me know if meeting more problems.

As you might know, due to the controversial secure boot ,  Windows 8 has got quite a lot of boot probelms, such as booting from CD/DVD, booting from USB drive, installing Ubuntu, etc.

 ::How to boot from USB on Dell Venue Windows 8 tablet?

Method 1: Hot Boot Method

-> Put your USB disk drive into the USB port on your Dell Venue Windows 8 tablet.

-> On the Start screen or the Desktop, press Windows + C keyboard shortcut or swipe inwards from the right-side display edge.

-> Click or tap on Settings and then click or tap on Change PC settings.

-> Click or touch on General tab.

-> Click or tap on Advanced Startup button.

-> Choose Troubleshoot option.

-> Select Advanced options.

-> Select UEFI firmware settings.

-> Click on Restart button after reading the instructions.

-> Highlight Security tab using arrow keys on the keyboard. (You need to connect a USB-port keyboard.)

-> Switch to Secure boot menu.

-> Ensure that Secure boot support is “Disabled.”

-> Highlight Save & Exit -> Select Save changes and exit and hit Enter.

-> Select OK.

-> Press and hold F2 key, which should bring back to the BIOS screen.

-> Go to Save & Exit tab.

-> Highlight “UEFI: Drive Name” under Windows boot manager and hit Enter.

Once you OK those above, you will be able to boot your Dell Venue from the USB drive you selected just now.

 Method 2: Cool Boot Method

Press Power button. (Now the tablet is powered off.) Next, press Volume Up button and hold it until you get the boot select menu.

On the next screen, under UEFI options, use Volume Up/Down to choose the device you want to boot from or touch on it to make it selected. In my case, I am going to select my KingstonDataTraveler. Next, hit Enter.

Good job! You now will be able to boot up from USB. Consequently, you will be able to run Ubuntu, Windows PE or Recovery drive on your Dell Venue Windows 8 tablet.

 Related Posts:

How to Open Windows 7 Without Password-Get into Locked PC

Like you know, we need to provide the login password before we can open Windows 7. But if we forgot them, how do we get into Windows 7 without a password? Some people may try to reset them with Windows password reset disk. But not everyone has made one. Is there any other option for them?

It is easy to answer the question. -You can definitely log in to Windows 7 without password if you ask Windows password rescuer Pro for help. Windows password rescuer is a software utility that can reset all kinds of Windows 7 passwords and consequently help you open Windows 7 without any password.

::So, how to open Windows 7 without password to get into locked PC?

-> Google, Bing or Yahoo “Daossoft Windows Password Rescuer Pro”. Download one and complete the installation. Or click this download link  directly.

-> Launch Windows Password Rescuer Pro on another computer that you can get into (You have rights to do so.).

-> Create a password reset disk by following the detailed instructions on the screen. Select medium type -> Select the inserted drive. -> Click on Begin.

-> Insert the disk drive to the locked PC. Adjust the BIOS settings to let the locked computer boot up from the password reset disk.

-> Once getting to the user interface, select your Windows 7 OS (if there are multiple OSs) and the user account whose password you can’t remember. And then click on Reset Password.

-> Restart the computer and then open your Windows 7 with the reset password.

-> Remember to change the default password in time to secure your Windows once you enter in windows 7 without password successfully. Here is my How to Change Your Password in Windows 7 . Read the post for the steps.

Once you OK those above, you will be able to open Windows 7 without password.  Just click on the arrow button on the right.

Related Posts: