Like you know, the BitLocker To Go feature was first introduced into Windows 7 to protect users’ mobile storage devices, such as a USB drive or an mobile hard disk drive. Nowadays, it has become quite mature. Here I am going to show you how to password protect your removable data drives in Windows 7/8/8.1
Actually, the steps are quite similar but they differ somewhat. I plan to have a detailed instructions about the ways for Windows 7/8 since the way for Windows 8.1 is almost the same as Windows 8.
★ Situation 1: Windows 7 ★ Situation 2: Windows 8 ★ Situation 3: Windows 8.1
Here’s How:
1. Click the Start button on the taskbar and then Control Panel.
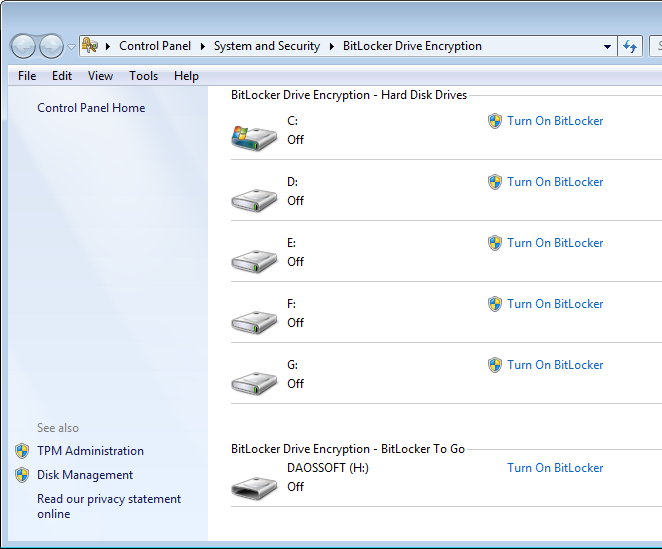
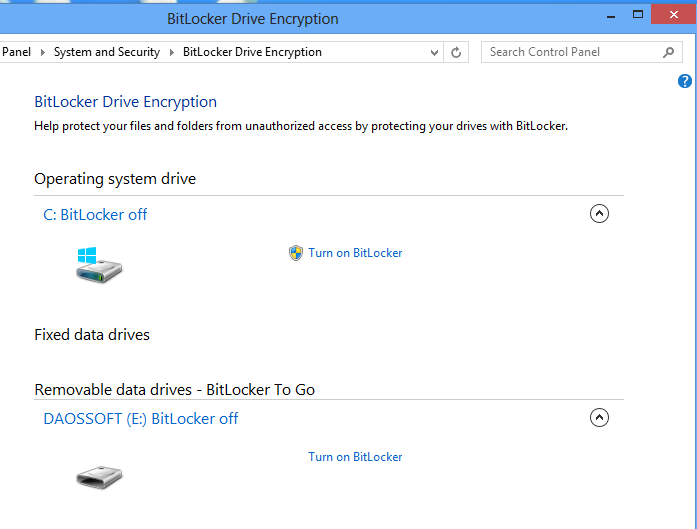
2. Click the System & Security and then Bitlocker Drive Encryption.
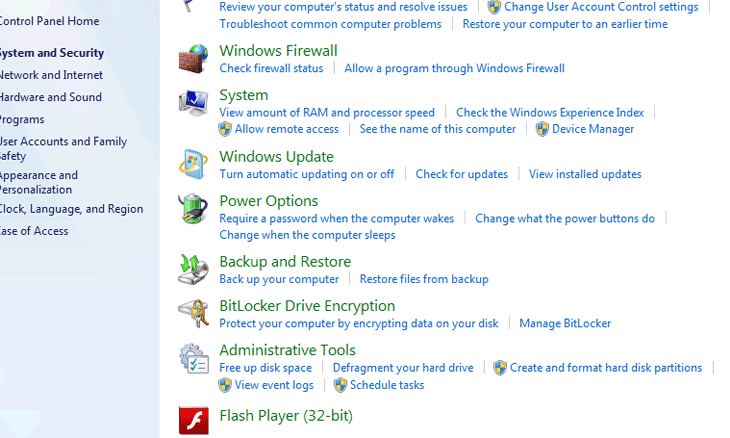
3. Click the Turn On Bitlocker link to the right of your drive.
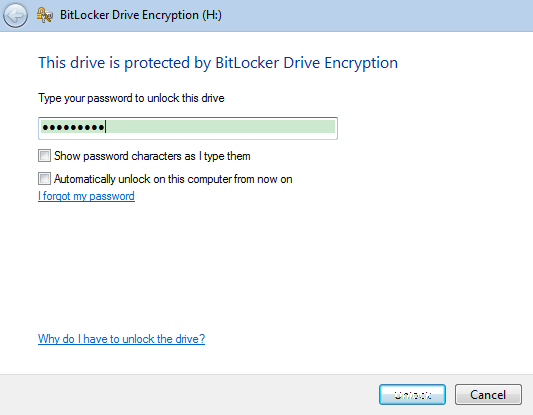
4. Choose a password or a smart card PIN or both of them to unprotect the drive.
5. Choose where you want to store your recovery key. You are allowed to save it to a file or print it.
Warning: If you get the recovery key lost, you probably will lose the access to your data for ever. So please make sure that you keep the recovery key safe.
6. Click Start Encrypting.
7: Final effect.
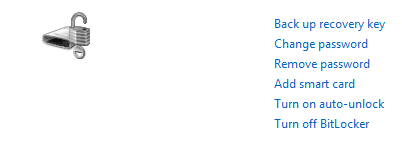
Note: If you want to undo the protection, just click Turn Off Bitlocker.
To begin, please insert or connect a mobile storage device first. Either a USB flash drive or a mobile hard disk drive is supported.
Here’s How:
1. Press Windows logo key + W to access the Settings Search. Then, type in "bitlocker" in the Search box.
2. Click Bitlocker Drive Encryption.
3. Click your drive and then Turn on Bitlocker.
4. In the pop-up new window, pick the way in which you want to unlock the drive. You can select a password or a smart card. (Take a password as example.)
5. Tick the checkbox of "Use a password to unlock the drive" and then input the password and verify it. (See the figure below.)
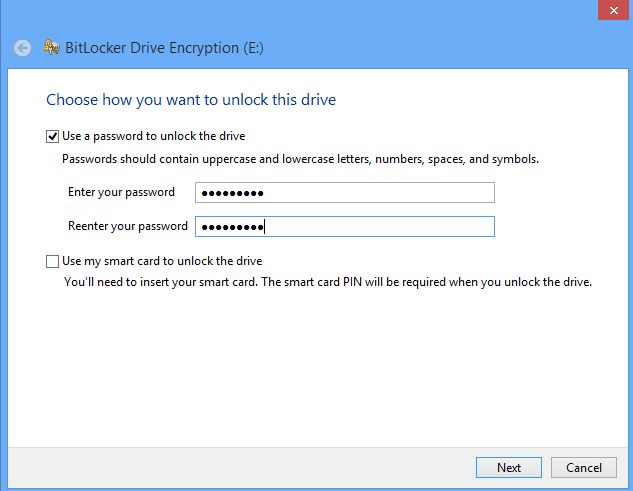
6. Click Next.
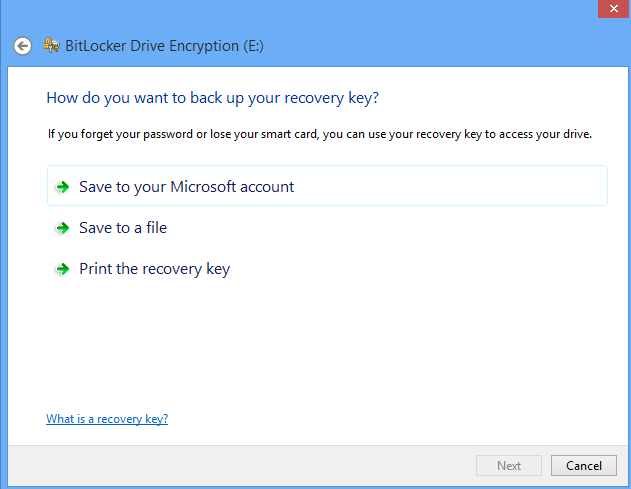
7. Select an option to back up the password recovery key, which can help you a lot when you forget the unlocking password. You can choose to save it to your Microsoft account, a file or print it directly. (See the figure below.)
Note: No matter how you back up the rescue key, you should make sure it is safe and available.
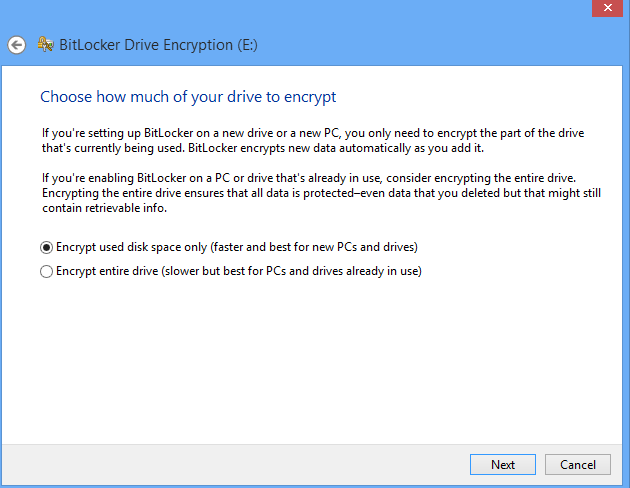
8. Specify how much of your drive to encrypt. You can choose to encrypt the whole drive or only the used disk space. The former one will take more time but is more effective and secure. (See the figure below.)
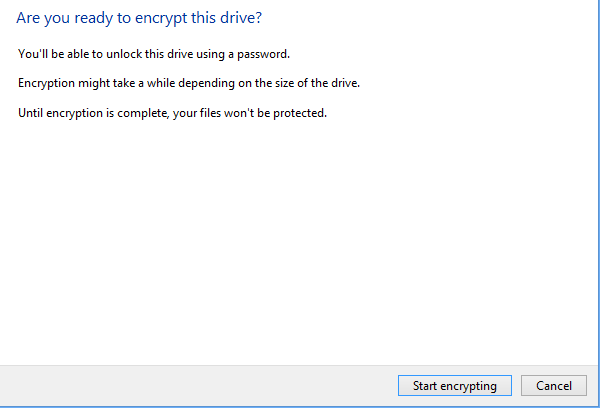
9. Click Start encrypting.See the figure below.)
10. If you want to cancel the password protection, just click Turn off Bitlocker.
The way and the detailed steps for Windows 8.1 are almost the same as those for Windows 8.1, so there is no need to show you both of them, I think. You can follow the instructions in Situation 2. Daossoft is at your service.

