Apple programmers make it easy and quick for Mac users to burn an ISO image file to disk with the burner tool built-in to Mac operating system. You won’t need a third-party application or software to burn. With the burner tool Disk Utility, you can directly burn an ISO image to a CD/DVD. Read on to see how to burn an ISO image file to disk with Disk Utility on a Mac.
You have to prepare the following things on hand:
An accessible Mac operating system
A blank CD-ROM or DVD-ROM
An ISO image file
Have no any ISO image file? Download one immediately.
How to:
Step 1: Insert a blank CD-ROM or DVD-ROM into your Mac drive.
Step 2: Click the "Spotlight" icon in the upper right corner on your Mac OS desktop and type "Disk Utility" in the search bar. Press "Enter".

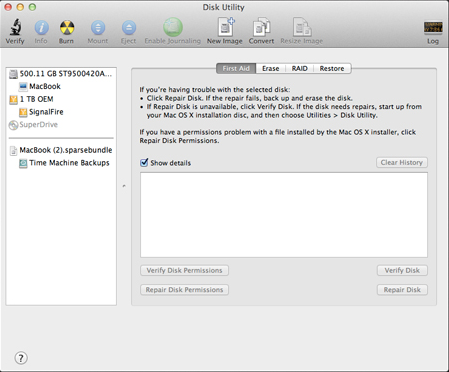
Step 3: Find and click the "Disk Utility". Now the "Disk Utility" window is open as below.
Step 4: Click "File" to pull down File menu and select "Open Disk Iamage". Navigate to the location of your ISO image file and click "OK". Then the .iso file should be listed on the left-hand column of Disk Utility.
Step 5: Select the ISO image file to highlight it on the left-hand column of Disk Utility.
Step 6: Click the "Burn" button in the upper left corner of the toolbar in Disk Utility. Then the burning process starts. Several minutes later the burning process is 100% completed, which means the CD drive has burned the image file onto the disk.

