Worried about privacy leaks? Want to set up protection for your PowerPoint presentations? This article shows you how to simply lock a PowerPoint presentation from editing.
You have two options to choose:
★ Create "Open" password and "Modify" password ★ Customized protection from the "Protect Presentation" feature
Option 1 of 2: Create "Open" password and "Modify" password
Here's How:
(For Office PowerPoint 2003, 2007, 2010)
1. Click Office button (PowerPoint Icon if PowerPoint 2010) on the top left.
2. Select Save As. (The Save As dialog box will pop up.)
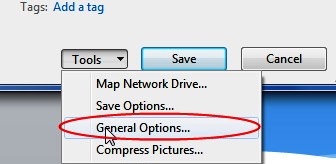
3. Click Tools drop-down list and choose General Options. (See the following picture.)
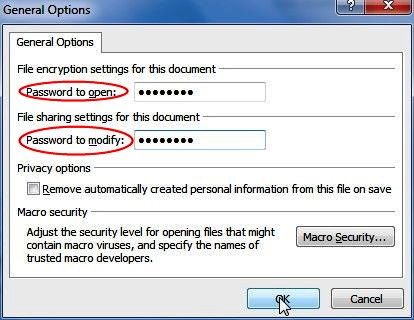
4. In the pop-up dialog, create passwords for the desired PowerPoint presentation. You are allowed to create a "password to open", a "password to modify" or both of them.
As you know, without a "password to open", no one can open the file unless it gets cracked. At this point, he can’t edit the document for he can’t open it even.
And a password to modify is used to apply the change(s) made to the PowerPoint presentation. No password, no changes will be saved to the protected document.
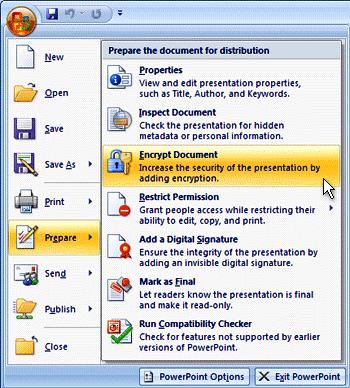
Besides, to create an "open" password, you can also click Office button, Prepare item and then select "Encrypt Document".
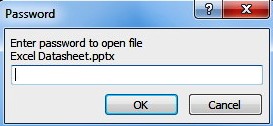
If you can see the following screenshot when you open the file above, that means you have made it. Congratulations!
Option 2 of 2: Flexible and customized protection from the "Protect Presentation" feature
(For Office PowerPoint 2007 or above)
Here’s How:
1. Open the PowerPoint file you want to protect.
2. On the Review tab, choose Protect Presentation.
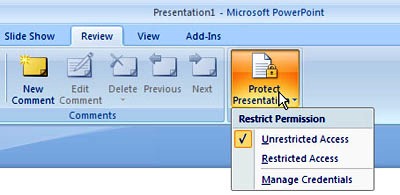
3. Next click Restricted Access. (The Permission window appears.)
(Windows Live ID or Microsoft account is required.)
4. In the Read box, give the email addresses of those who may read the document. (Divide items with a semicolon.)
5. In the Change box, input the email addresses of those who may edit the document.
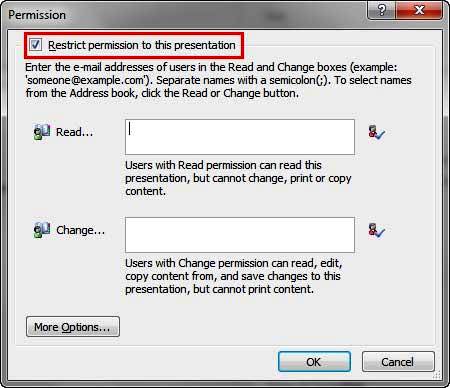
6. Next, you can enter the More Options setup and make the PowerPoint document expire after the date you set. Furthermore, you are able to restrict the printing of contents or make other changes.
That’s it. May it help you!