Different operating systems function differently. But no matter which operating system you adopt, you may encounter one same problem. That is you may suffer file loss due to computer virus attack, disk damage or mistaken operations and some other reasons unexpectedly. There is no exception with Windows 7. And this article is especially written for Windows 7 users to instruct how to recover deleted files in windows 7.
Windows 7 is a classical operating system of Microsoft. It is preferred by the majority of users for its many outstanding advantages. It is easy to use and most energy efficient. It has rapid starting speed and splendid operating interfaces and so on. Despite all these merits, you cannot avoid not suffering from data loss in the process of frequent use. When data loss happens on you, you starting to wonder how you can recover lost files in Windows 7 most easily and rapidly. Then I recommend that Daossoft Data Restore is exactly what you are looking for. It is professional file restore software and can easily and efficiently recover deleted files with only a few steps. It is not only works well in Windows 7, but also in Windows vista/XP/2000/2003/2008. Now let me show you the exact steps.
Step 1: Download Daossoft Data Restore software from our official website and install it in your Windows 7 computer. Note: in Windows 7, this software requires the administrator privilege to install and run.
Step 2: Connect the removable disk to the computer if the deleted files are on a removable disk.
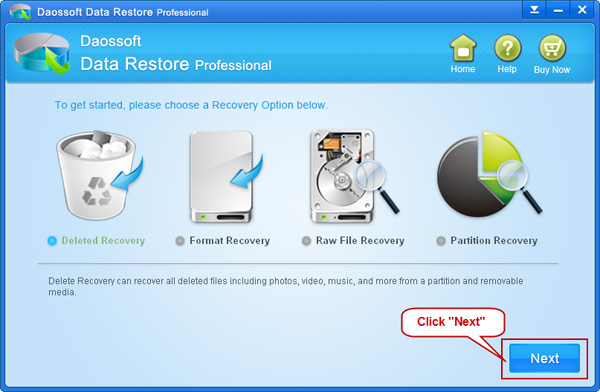
Step 3: Launch Daossoft Data Restore software and select “Deleted Recovery” option. And then click “Next” to go on. Tips: Try “Raw File Recovery” mode later again if “Deleted Recovery” mode cannot find the files you want to recover.
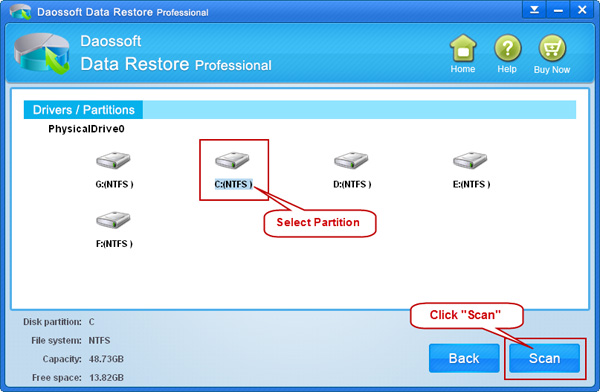
Step 4: Select the right partition or drive your deleted files are on and then click “Scan” button to scan.
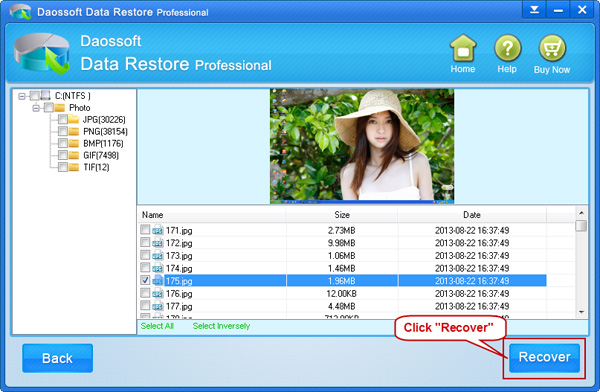
Step 5: After the scan, preview first to pick out files you want and select the wanted files, and then click “Recover” button to recover. Note: Don’t save the recovered files to the partition or drive where the lost files are originally on.
Tips: If the files cannot be previewed and you have difficulties recognizing the files you want by the file names, you can try to pick out them by the following attributes:

